Running Distributed vLLM with the MultiProcessing Backend
When a single worker does not have enough GPU memory or compute to host a model, vLLM can split one model instance across multiple workers for collaborative inference. GPUStack orchestrates these cross-node processes as a single model instance and exposes only one OpenAI-compatible endpoint. vLLM offers two execution paths through the --distributed-executor-backend parameter: ray and mp (MultiProcessing). This tutorial shows how to use the MP backend to run distributed inference across multiple workers with a combination of tensor parallelism (TP) and data parallelism (DP).
In this tutorial, you will learn how to enable cross-worker distributed inference on GPUStack, explicitly select the MP backend, and combine tensor parallelism with data parallelism to deploy a single model instance across two nodes.
Note
- The MP backend takes effect when you explicitly set
--distributed-executor-backend=mpinBackend Parameters, or when you use a custom image (a backend version with the-customsuffix) with vLLM ≥0.18.0. Starting from0.18.0, vLLM no longer depends on Ray by default, so GPUStack automatically falls back tompto avoid startup failures. - For the conceptual differences between the Ray and MP paths, the headless follower, and the
dp_only/mp_only/nestedtopologies, see theDistributed Inference Across Workerssection in Built-in Inference Backends. - This feature is currently experimental.
Prerequisites
Before you begin, ensure that you have the following:
- GPUStack is installed and running.
- At least 2 Linux nodes, each with the same number and the same model of GPUs. This tutorial uses 2 nodes × 8 GPUs (16 GPUs in total) as an example, applicable to accelerators from various vendors such as NVIDIA, AMD, and Ascend.
- A high-speed interconnect between nodes (such as NVLink or InfiniBand) is recommended for better performance.
- The model files must be accessible at the same path on every participating node. Use a shared filesystem, or download the model files to the same path on each node in advance.
- The selected model is suitable for a
tensor-parallel-size=8,data-parallel-size=2layout (that is, each data-parallel replica occupies one full 8-GPU node).
Note
This tutorial assumes that each data-parallel replica (tensor-parallel-size=8) fully occupies one 8-GPU node. Adjust --tensor-parallel-size and --data-parallel-size according to your model and hardware.
Step 1: Add GPUStack Workers
Following Installation, run the join command on each node to add them to the same GPUStack cluster.
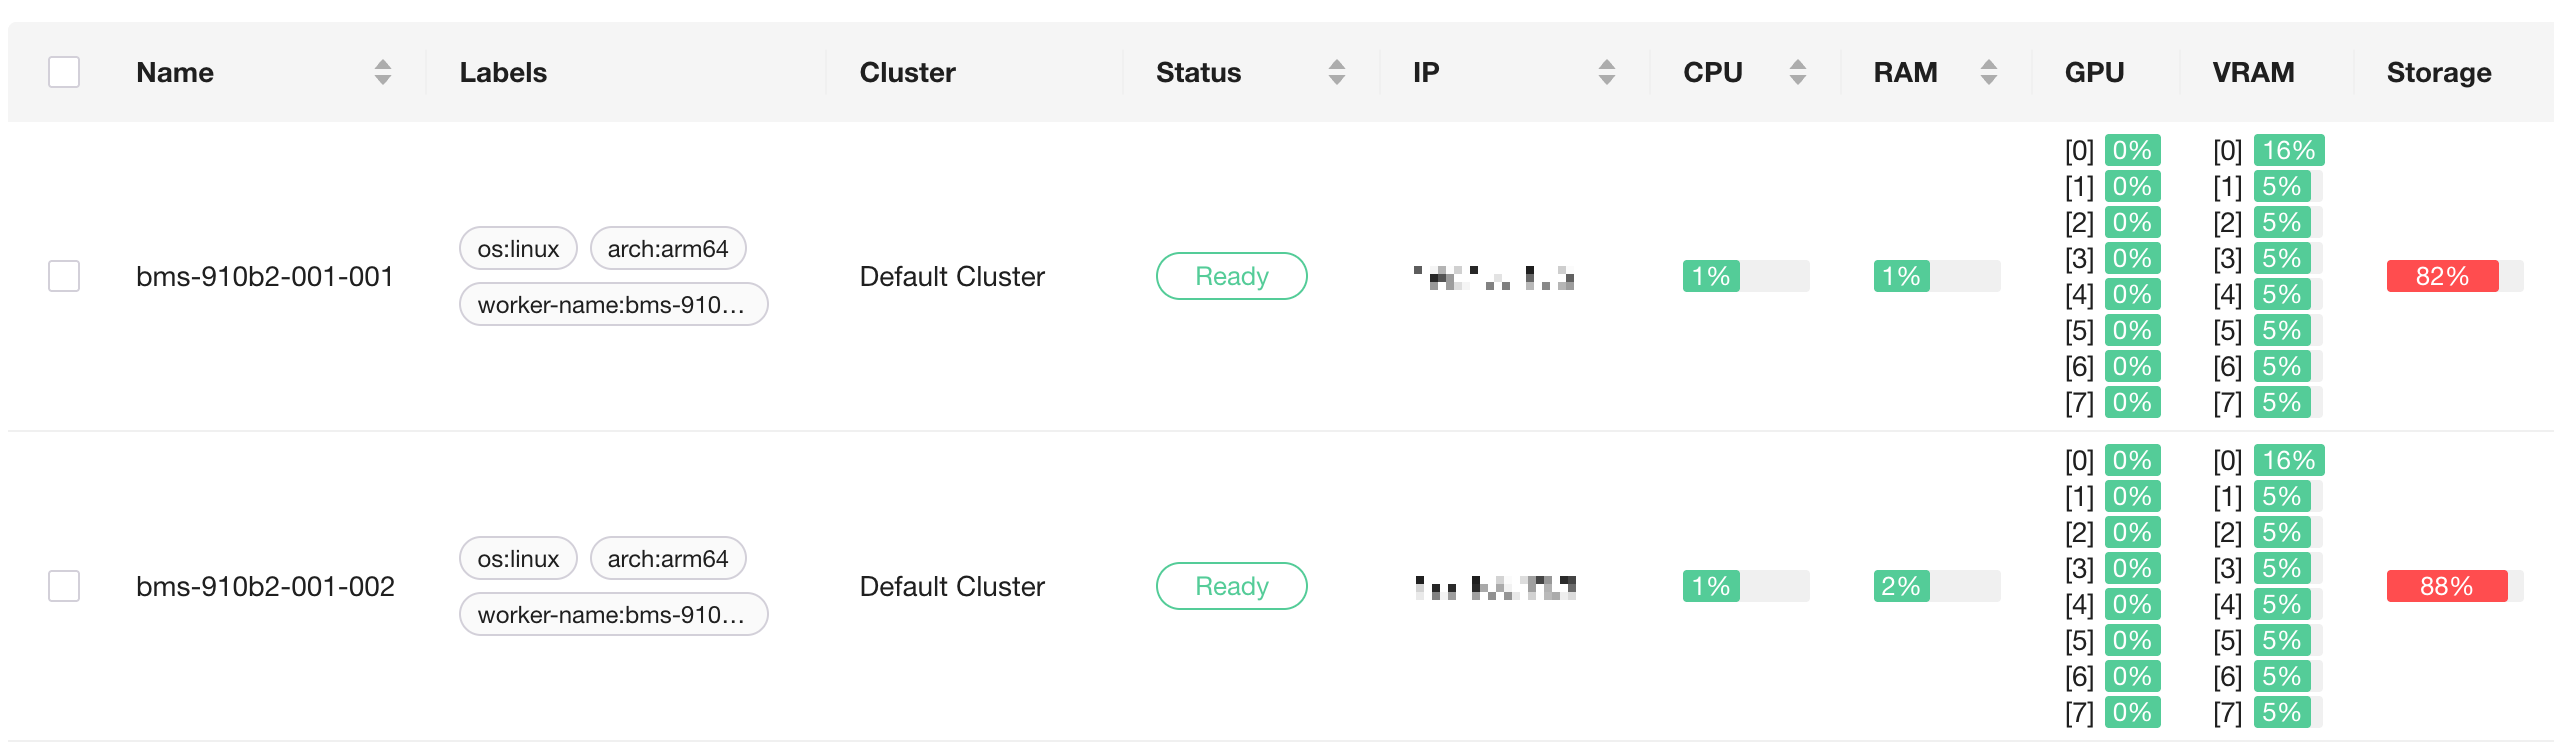
After they join, confirm on the Workers page in the GPUStack UI that both nodes are in the Ready state and that their GPUs are listed.
Step 2: Deploy the Model with the MP Backend
- Navigate to the
Deploymentspage. - Click
Deploy Model, select the model source (such asLocal Path), and enter the model path that is consistent across all nodes. - Confirm that
Backendis set tovLLM. - Under the advanced settings, check
Allow Distributed Inference Across Workersto enable cross-worker distributed inference. -
Add the following parameters in
Backend Parameters: -
After passing the compatibility check, click
Saveto deploy.
Deploy the entire distributed instance as a single deployment
We recommend deploying a cross-node distributed instance as a single deployment. When you create only one deployment as described above, GPUStack will:
- select GPUs across both workers (16 in this example) and automatically derive the per-node
--data-parallel-size-local, so you do not need to set--data-parallel-size-localmanually; - inject the multi-node topology parameters
--nnodes,--node-rank,--master-addr, and--master-port; - automatically add
--headlessto the follower instances, so they only participate in distributed computation and do not start an API endpoint. Seeing--headlessin the follower logs is expected.
When automatic scheduling cannot be satisfied
If automatic scheduling cannot allocate resources because a condition is not met (for example, the GPU memory does not satisfy gpu_memory_utilization), switch Scheduling Mode to Manual or Specify GPU, and then use the GPU Selector to select 8 GPUs on each of the two workers (16 in total). See Built-in Inference Backends for the full conditions of automatic scheduling.
When splitting into multiple deployments manually: use GPUSTACK_SKIP_GPU_COUNT_CHECK to skip the GPU count check
In some scenarios, you may want to create one deployment per node (for example, to manage an external load balancer yourself), selecting GPUs manually and setting --data-parallel-size-local 1 by hand. In this case, each deployment selects only 8 GPUs, while tensor-parallel-size × data-parallel-size = 16, so GPUStack reports an error because the GPU count does not match the world size: the selected gpu count (8) does not match the world size (16).
If this is your intended layout, set GPUSTACK_SKIP_GPU_COUNT_CHECK=1 in each deployment's Environment Variables to skip the check and keep your manually selected GPU count. This switch takes effect only when GPUs are selected manually (Scheduling Mode is Manual or Specify GPU) and does not affect automatic scheduling.
Step 3: Monitor Deployment
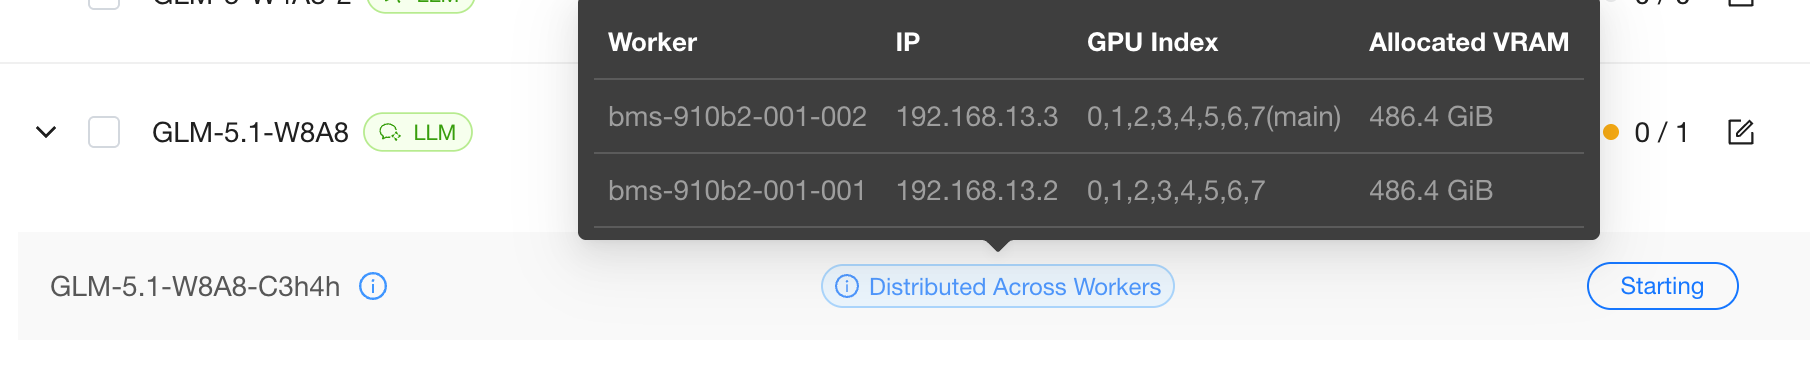
Monitor the deployment status on the Deployments page. Hover over Distributed Across Workers to view the instance's GPU usage on each worker. Click View Logs to see real-time logs:
- The leader instance loads the model and exposes the OpenAI-compatible endpoint;
- The follower instance logs show
--headless, which means it only participates in distributed computation and does not occupy an API port. This is expected.
Loading the model may take a few minutes.
Step 4: Verify via the Playground
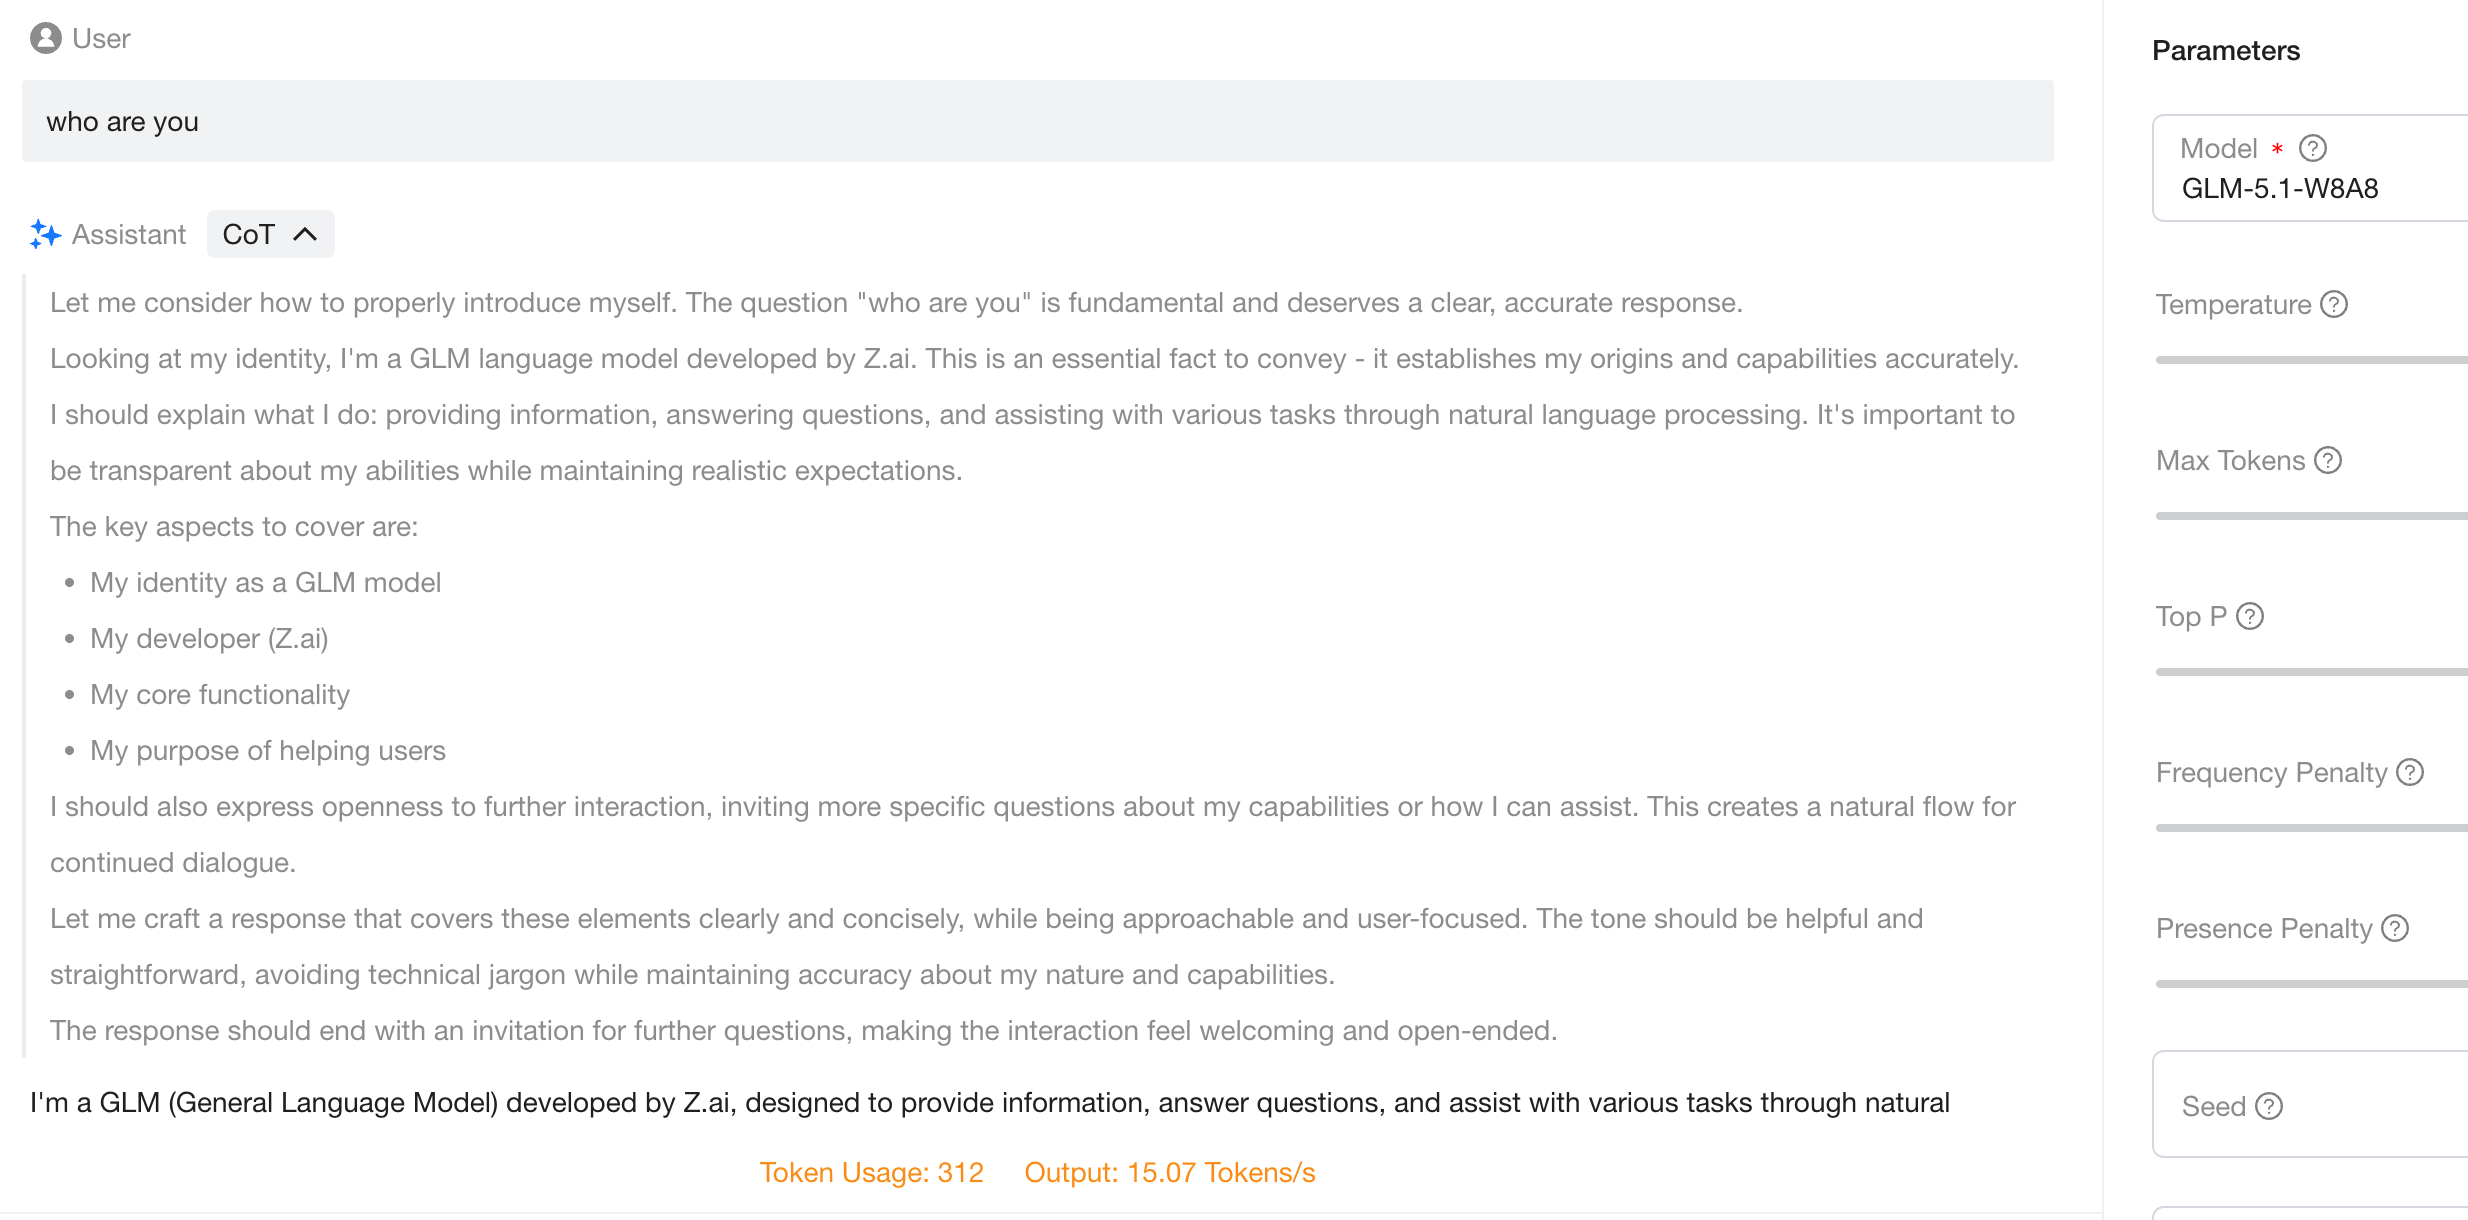
Once the deployment is running, verify it directly in the GPUStack Playground. All external requests enter through the leader, which dispatches them to the followers, so the usage is identical to a single-worker deployment:
- Navigate to
Playground>Chat. - If only one model is deployed, it is selected by default; otherwise, select your model from the drop-down menu in the top-right corner.
- Enter a prompt and interact with the model.
You have now successfully deployed and run distributed inference across multiple nodes on a GPUStack cluster using vLLM's MP backend.
If you need further assistance, feel free to reach out to the GPUStack community or support team.